Oh I just love experimenting with makeup products. It’s just so much fun with all the colours and techniques…trying out new looks I’ve seen on YouTube or in reviews and of course coming up with my own looks and creations. It’s just so much fun!
The guys over at Beauty Bulletin sent me two awesome products to review from Avon Cosmetics: the Eight-In-One Metallic Colour Palette and the Glimmerstick in Blackest Black.

Avon 8-in-1 Colour Palette – The Metallics
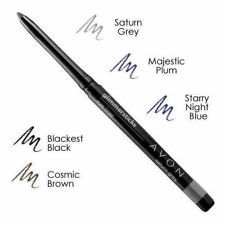
Avon Glimmersticks
Now, if you have been following my blog, or following me on Twitter, you will know that I am not really for the full coverage heavy makeup look. I prefer to keep it simple, natural and light. I just love that natural makeup look with a glowy complexion, flushed cheeks and big, bright eyes lined, mascara-ed and lightly shadowed with a neutral/natural/earth-toned colour. The one area of makeup where I am not afraid to go wild is the lip – bright fire engine red or a show stopping neon orange and of course a favourite for the spring/summer months: Pink! Either the natural looking nude pink, the baby doll pink or that stand out hot fuchsia kind of pink.
So when this metallic eye shadow palette came along and I saw the colours in the palette, I knew instantly that I was about to leave my comfort zone of natural and earth-toned eye shadow looks. I sampled one or two of the colours on the back of my hand. These are definitely daring colours and most suited for a night out on the town. But, I was willing and, like you should know by now, I am a curious little kitten. I started to feel that excitement bubbling up and began to think of all the crazy smoky eyes I could create.
Now when it comes to the Glimmerstick…that is right up my ally. I love eyeliner. I can simply just line my upper waterline and then add a visible but not bold cat eye in the outer corners of the eye, add tonnes of mascara (LOVE that stuff)…no shadow (but primed eye lids) and I’m good to go. For me personally, eyeliner completes the eye. It makes the eye appear bigger (when applied correctly) and so much more beautiful . If you know how to use the stuff to enhance the shape of your eye, your eyes will just pop! This Glimmerstick is amazing. It glides on so easily and is so intensely black, it defines fantastically! And the fact that it’s a retractable liner…no more sharpening of pencils (and I’ve actually lost my sharpener and I never remember to buy one so thanks Avon!).
So below is my first look using the palette. I thought I should start a little safe and do the classic brown smoky eye. And away we go!
First step – Prime them lids
Using your favourite primer, prime your lids so that your eye makeup will last longer, stay put and won’t crease.
Second step – First colour – which is your lightest colour – applied to the entire eyelid area
Use an eye shadow brush of your choice (mine is the an All Over Shadow brush from Beautix bought at Edgars). Use the lightest colour in the palette and apply the colour all over the eyelid area and continue up until just under the brow bone. Gently sweep over the area to make sure the product has been evenly applied and blended. Remember to keep a wipe or tissue nearby so you can wipe up any excess product before using the brush for another colour.
Third step – Second colour – the next one after the lightest – applied to the lower lid of the eye
Using either the same brush used above (cleaned) or using an applicator (I am using the one provided with the palette), choose the lighter brown shadow and apply this colour to your lower lids. Do not go into your crease area or above. Stay on the lower lid.
Fourth Step – Third colour – the darkest colour – applied to the crease and outer corner of the eye
Once you are happy with the above step, you can move on to defining your crease and outer corner of the eye. To get that sultry “V” effect on the outer corners of your eye, add some sticky tape as seen below to help guide you. This will also come in handy when you apply your eyeliner. Using a crease brush (mine is from Beautique available at Edgars stores), apply the dark brown colour into the crease starting at the centre and working your way across in short strokes from the inner corner to the outer corner. If it helps, when you get to the outer corner of the eye, open your eye and look straight ahead into the mirror (at eye level) and use quick left to right strokes to help get the product just above the crease to create a shadow effect. If you are using the sticky tape tip, you won’t need to worry about messing or keeping in line so continue defining the outer eye until you are satisfied with the effect.
Fifth step – apply Glimmer stick to upper water mark and create cat eye
Oooh! Eyeliner time! Gently remove the sticky tape if you are using one. Use the Glimmerstick to define your top waterline – whichever way you feel comfortable applying it should work…I usually apply mine right at the lash line (after years of doing this, I no longer flinch, blink or have watery eyes when I do this) and a little on the top of the lid to begin the cat eye effect (wing). Keep extending the line where the sticky tape used to be (under the defined outer corner of the eye). You can decide how dramatic you want it to be in terms of length of the cat eye wing and thickness on the upper lid. Once you are happy with the result, continue the liner on your bottom waterline. If you are into smudging, then go ahead using either your crease brush (cleaned) or a smudging brush to create a smoked out look on the bottom eyelid.
Sixth step – Fourth colour – black – further define the crease, outer corner, and bottom lid
Very lightly, take your crease brush (cleaned) and use a little of the black colour to further define the work you’ve done on your crease area and the outer corner of the eye. Remember that we are simply giving this area more definition so use as little of the black colour as possible (you still want the dark brown to be visible) until the crease and the outer corners are defined and stand out enough to make the eye appear almond shaped. Do the same to the bottom lid if necessary.
Seventh step – some shimmer and pop
Using one of the applicators provided in the palette, either use the silver colour in the palette or another light (closest to white as possible) shimmery colour of your choice to apply to your tear duct area and under the arch of your eye brow. In the tear duct area, gently blend the shimmery silver (or your chosen colour) into the smoky effect on the bottom lid as well as going up into the inner corner of the eye. Do the same to the colour applied below the arch of the eye brow.
Eighth step – mascara
Using your favourite mascara, add at least three coats (waiting about twenty seconds in between each coat) to your lashes. Use a mascara that lengthens and thickens. If need be, like I do, use a combination of mascaras. I use the Lo’Real Telescopic mascara for length and the Smashbox Full Exposure mascara for volume and thickness. Alternatively, you can use falsies.
And voila! Your finished look!

Brown smoky eye
I hope you try it and you love it. Next time I’m going to use a mix of colours so keep your pretty peepers peeled for that!
Until next post…take care! 🙂
